| Sean McVeigh's MAME
Cabinet Project see MAMEWorld to figure out what on earth I'm talking about |
|
| Introduction Design Cabinet Controls Interfacing PC Guts Audio Video Links |
Controls The construction of the control panel yielded the most instant gratification of any stage of the project so far. I was hell-bent on a 4-player setup, with 2 trackballs, and hopefully a spinner somewhere in there. As mentioned in the Design section, I had already acquired the trackballs, joysticks and buttons in order to build an ad-hoc test controller. Once I was satisfied that the electronics would work, I returned once again to AutoCAD to lay out the controls. I decided to make the control panel wider than the cabinet to accommodate the 4-player configuration. It wound up taking up 4x2 feet, which fits perfectly with the available materials. To give the players maximum elbow-room, I opted to orient the 2 outermost sets of controls at a 30 degree angle to the others, since the control panel itself follows this profile. The layout (minus the spinner) looks something like this: 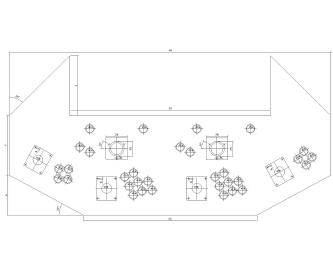 The spinner will simply require a 3/8" hole for the shaft and a couple of screws to hold it in place, and will be located either in the center of the panel or slightly to the left, placing it closer to the player-1 controls. I chose a nice 1/4" sheet of birch for the control panel. A 3/32" sheet of plexiglass was laid on top of the birch, and I took the jigsaw to it. I followed up by piloting the marked center-points of all of the cutouts and then drilling holes with either a 1-1/8" spade bit or the 2-1/4" circle-saw. Luckily the spade bits didn't crack anything. What I ended up with looked something like this: 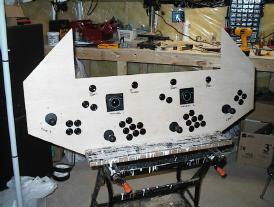 I had to cut out square openings in the birch for the trackballs, because they sit too low in the panel otherwise. They are fastened directly to the plexiglass. No matter.. the artwork will sit between the rough square cutout and the plexiglass anyways. I may consider supporting the trackballs from underneath, just so I don't ever crack the plexiglass. And by the way, I did crack the plexiglass in one or two places due to tightening down the bolts with the drill's clutch set too high. 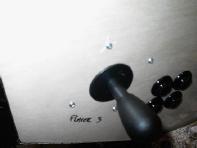 Oh, and one more tip... while I was cutting out a small square piece of plexiglass to bring the trackballs flush with the surface of the panel, I discovered that 3/16" plexiglass should not be cut with a jigsaw unless it is sandwiched between something heftier. 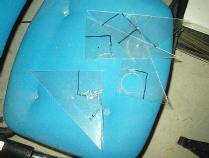 I felt a lot like Sideshow Bob on that episode of the Simpsons where he repeatedly (9 times?) stepped on garden rakes and was smacked in the face. Saw, SNAP, crap. Saw, SNAP, crap. This time I'll go slower... Saw, SNAP, crap. Lets try clamping the plexiglass from the other side, it seems to crack in that direction.... Saw, SNAP,crap. Needless to say, I eventually used a hacksaw to get the job done. The rear (bottom?) of the control panel looks like this with the controls attached. 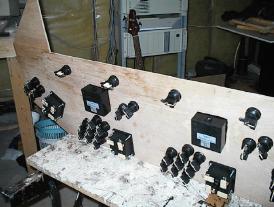 I should probably mention that all of the joysticks and pushbuttons are microswitch-based. This might not be good enough for some purists who prefer leaf-switch controls, but I like that the switches are reliable and easily replaceable should any of them fail. I'm not bothered by the clickity sound of gameplay. I will just turn up the audio. I wasn't quite sure what to do about artwork under the plexiglass. One idea involved designing custom artwork and having it printed up at 4x2 feet. Severeal people seem to just paint their control panels. Well, I couldn't just paint it black, because all of my controls would quickly become invisible so I figured I could get away with some marbled poster paper and stick on red lettering. It wound up looking quite nice. 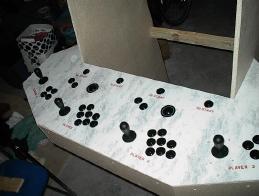 Here's a wider shot of the control panel attached to the cabinet. (note the speakers are mounted as well by now). 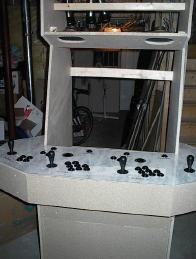 The only control still missing is the spinner for games like Arkanoid and Tron. I was amazed what sort of prices these were going for on eBay. I was fairly confident I could just build my own, since a spinner is merely a 1-axis mouse. I will be wiring one axis of one of the trackballs to the same place as the spinner is wired (more on this in the Interfacing section). A simple mechanical switch will just toggle between trackball and spinner as desired. A software approach to solving the problem of which control is active sounds like overkill, and prone to glitching due to the sensitivity of the trackballs. ... a week passes ... I've got the interface board for the controls finished. Here are the controls partially wired (soldering 100 connectors took longer than anticipated). 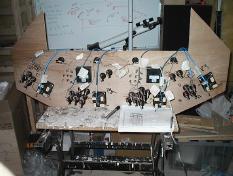 And here you can see the special MAME control buttons. I placed them on the underside of the panel to keep them out of the way. 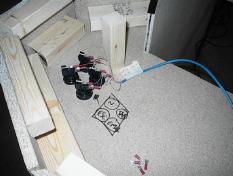 The pause button is also mounted on the underside of the panel, but it is located in the center. One other intersting modification I've made over the last day or so was the addition of a 4-way/8-way joystick mode selector switch on the top of the panel. By flipping this switch, all of my 8-way joysticks are turned into 4-way sticks by the firmware on my interface board. A neat feature, and much cheaper than adding a dedicated 4-way joystick for games like Pac-Man, Frogger, and Donkey Kong. It also takes up far less space than another joystick would. I placed the switch up near the top of the panel where the 4-player start button is. I'll be placing another toggle switch somewhere else around that same area to select between the spinner and one of the trackballs. spinner arrives.... So I mounted the spinner (sorry, no photo right now), and put the toggle switch on the panel to select between trackball 1 and the spinner. It works perfectly for tron and the like. Arkanoid is a bit trickier, probably because the spinner resolution is different for that game. Either that, or I just forget how tough that game is to play. update - October 20, 2003 So my mother is coming to visit sometime next month, and she just loves to park herself in front of Ms. Pac-Man. The only problem is that she easily gets frustrated with my pseudo-4-way control hack. To correct this problem, I ordered a wico leaf-switch stick (with the red ball top), machined a plate to restrict it's movement to 4-directions only, and mounted it in the open space between player-3's stick and the second trackball (really running out of space on that panel!). The restrictor plate was machined from a fiberglass PCB fragment using a drill-press and my DeWalt rotary cutout saw. Basically it's a plate with 4 holes to mate up with the screw holes on the base of the stick, and a diamond-shaped cutout which stops the stick from travelling into the corners. I did it this way to get a mechanical 4-way feel that you just don't get when using an 8-way stick with a smaller 4-way actuator (which I also didn't have). It works like a charm and is wired up in parallel with the player-1 joystick, so I don't have to reprogram anything to use it. I like the look and feel of the ball-top leaf-switch wico joystick so much that I've ordered 4 more to replace the X-Arcade microswitch style sticks I've been using for the past 6 months or so. The leaf-switch sticks don't produce that annoying clickity-click that the more modern microswitch designs do. The clickity-clicking gets annoying quickly, and it's not quite how I remember arcade machines sounding! Of course, almost all games built nowadays (including the new Ms. Pac-Man/Galaga machines) use microswitches because they are more reliable and wear out slower. Well, they must be using different switches than my X-Arcade parts, because I've had at least 4 switches go flakey on me thus far. Thankfully these switches have 3 contacts, a common, a normally-open, and a normally-closed contact. I've been using the N.O. contacts for all of the controls, unless the switches start to go bad (muxt be oxidizing or something?), and then I switch to using the N.C. contacts and I make a modification to my firmware to invert the sense of that switch. Ah, the advantages of designing your own interface board :) Anyways, I should be receiving the leaf-switch sticks any day now, and when they arrive, I'll get some updated photos posted. Real Estate Problems! As I discovered while mounting my new 4-way stick, I am almost out of space on the control panel. There is nowhere left to put any neat new gizmos. Thankfully, the panel is so complete, that I'm not too worried... or am I?? I've recently had the urge to play Star Wars and Spy Hunter, but these games as you may know, use analog controls like flight yokes and steering wheels. I've been beating my head up trying to figure out how I can possibly fit a steering wheel in there.. could it be grafted onto the front of the control panel, and made removeable.. sure it could, but I don't think it would be quite right to do so. Couple this desire with the fact that as I was adding new things to the panel (trackballs, spinner), I wasn't as careful choosing connectors as I could have been -- some wires would need to be desoldered to remove the control panel, and it's already quite difficult to open it up and do maintenance on the guts... and so... The Plan for the Modular Detachable Control Panel is Born! When I receive my new leaf-switch sticks, I'm going to do a major overhaul on the wiring plan. Basically I'm going to disconnect my interface board from the controls (easy, since it is connected with screw-down terminals) and route the wires to a large connector.. probably a 96-pin high-speed type connector (3 rows of 32 pins). Along with the controls, I'll also wire the trackballs and spinners up to the connector. Once I've done that, I'm going to remove the interface hardware from the control panel (it is screwed down right now) and move it to the inside of the cabinet. I'll mount a matching 96-pin connector on the inside of the cabinet to mate with the connector on the control panel. (perhaps I'll actually use a pair of headers instead with a large ribbon cable to connect them instead, we'll see). Lastly, I'll make some sort of handy mounting lugs that can be used to easily disconnect the panel physically from the cabinet (right now it is held in place by 2 screws at the side). Once that's accomplished, I should be able to simply disengage the mounting lugs/clamps/bolts(?) and pull a ribbon cable to detach the entire control panel. I can teach the firmware on the interface board to recognize that this has happened and suspend output to the PC (probably through the use of some keyed presence pins, that can be used to identify the panel.. or perhaps an I2C interface? serial eeprom complete with part numbers, identifiers, etc. hah). A new modular panel could then be mounted by attaching its cable and fastening the lugs/clamps/bolts. That would easily open the door up to redesigning the existing panel, building a driving panel, a flight panel, perhaps using authentic original control panels from existing games (those tron panels on ebay are very tempting... it's too hard to play without a trigger stick), analog sticks (space harrier was one of my alltime favorites, afterburner would be cool too), you name it! I'll update the site within the next month or so with progress on what will most likely be a built-from-scratch starwars flight yoke. Imagine my surprise when I discovered that the PC joystick port takes analog inputs directly in the form of 100K potentiometers, and not as I had assumed a PWM modulated signal! (that's done internally for me!) Cool! ...more.... |